Thursday, December 13, 2007

Week 5 over!


I can't believe that we have done 5 weeks worth of lessons - the time has disappeared in a flash. There has been so much to digest in those 5 lessons and now number 6 has arrived and once again it is full of information - lovely stuff on textured stitches - some of the most beautiful. It was a textured piece of Sharon's that enticed me to attempt these classes - the seahorse piece she uses to advertise the Sumptuous Surfaces class. Now if only I can hope to do something as beautiful as that one day!

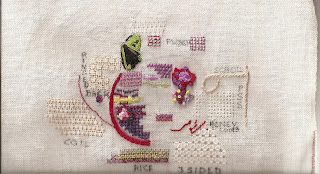
This last week was very interesting with its emphasis on shape and direction. This sampler is a combination of that plus an attempt to cover some of the new stitches that Sharon has provided for us. I love the 'pine tree' on the left -unfortunately I had trouble in keeping the cable chain foundation row even, both in tension and in stitch length. Definitely needs more practice. Maybe I need to go back to stitching on Aida.

Stacking rows of stitches produces some negative spaces just crying out for a contrasting stitch pattern. Again, unfortunately my 'lazy daisy' leaves much to be desired! At least I should not be at a loose end for quite some time.

I should have done more work but ran out of time - it is definitely the wrong time of the year for this. However I move on to Lesson 6 and hopefully will manage to do some work in the next week.

Sunday, December 9, 2007

Asymmetry


At this time of the year I need to curtail my stitching - however I do want to keep up for these last two lessons. It would appear that I need to do fewer samples.
This week two of the design tools we were to examine were what happened to stitches when we applied assymetry and and what happened when we stacked stitches. I still had not completed my herringbone sampler from the last lesson and it seemed to me that this stitch could be a good candidate for testing assymetry. The band on the left uses two rows of stitches worked assymetrically but mirrored around a symmetric row. I then added assymetric fly stitches in spaces and knots in the centre of the normal rows.
The band on the right consists of 4 rows , mirroring each other, again forming interesting spaces. I left one section untouched and used stretched cross stitch in the spaces formed on either side. I had not previously considered the implications of changing the shape of stitches this way and was delighted to see how neat it can be.

Saturday, December 8, 2007

Lesson 5


This is my first sampler for Lesson 5 - unfortunately although I transferred good circles to the felt it refused to stay in shape - so I can pull it around and it looks good on one motif but another then goes askew!


Two of the motifs were inspired by the Ikea inset in yesterday's Courier Mail -I thought this might be nice and Christmasy. I think that next year I might try to make some decorations using this idea.


The top motif is detached chain with threaded back stitch.


The middle one is stitched in cretan stitch and long legged detached chain plus some extra detached chain to hold the legs in place!


The bottom motif has a buttonhole wheel centre, then two backing rows of half chevron with knots in the centre and is surrounded by crested chain.

Wednesday, December 5, 2007

Marbled fabric


This looks less lurid in the scan than in real life!
Maybe I will use the right side and see what I can design!
The marbling workshop was lots of fun but I tended to use only the primary colours - not a great idea!

Just finished in time for Lesson 5


No, I haven't embroidered this in one day! It is a piece that I began in Lesson 2, when we were studying design, in particular point, and have been working on slowly in the meantime.
The threads are all cotton, some of the 2/20 yarns are handdyed - variegated thread does work quite nicely in a piece such as this.
The fabric is of interesting origin. About 20 ? years ago I did a workshop on marbling and kept all of the pieces I did , despite the fact I found them all rather lurid. I do find it difficult to throw anything away! I couldn't see the front of this fabric being of any use at all - however the back provided the background Iwanted for this stitching. I will scan the fabric and it will be obvious why I needed to reverse it!

Another felt experiment


This is an attempt to change the density of stitches by layering. I have attempted to depict some grasses inspired by a painting in a 'how to paint' book - copyright could never be contravened as any resemblance is purely coincidental!!! However I added some net over the bottom layer of stitches - black and white were the only colours in net I had available and white didn't produce the effect I wanted on the grey felt. (The same felt I used for the cretan stitching in lesson 1)
After adding another layer of stitches I tried some silk chiffon to produce a shadow effect at the bottom - it was too dark - practically nothing showed through. However more of the black net did do what I wanted. So then I added a third layer for the dark shadow.
The threads used are 2/20, 2/22 and 2/24 woollen weaving yarn that was in the cupboard - fortunate that I had such good grass colours.
I intend to acquire some different coloured nets and also net of different density as this was quit coarse.

Monday, December 3, 2007

Herringbone Play!


Definitely a "Work in Progress"!
This is still part of lesson 4 . However,j I have decided to leave this sampler for the moment and move on to a more freestyle piece investigating density, using scale and tone. Aida, the fabric I have used for this sampler, is much too rigid for the experimentation I would like to try before Lesson 5 arrives. It is difficult to believe that the class is two-thirds over!
Only DMC cotton floss was used for this sampler, with the exception of one row of lurex knitting yarn used in the heavy band - I am not sure it shows in the scan very well but it peeps through the stitching giving an effect that I will certainly repeat.

Saturday, December 1, 2007

Lesson 4

The weeks move on, inexorably! Here we are more than half way through the lessons (and one week closer to Christmas - my preparations really need to get under way!).

This is my first sampler for Lesson 4 - the key is beginning at the top - Half Chevron stitch

1. Variegated sewing machine cotton
2. 2 threads of 2/60 mercerised cotton
3. Perle #12
4. Fine weaving silk
5. Semco coton a broder
6. Linen weaving thread
7. Handdyed 2/20 wool
8. 12/2 cotton
9. Lurex knitting yarn
10. Perle #3
11."FunkyFibre" - polyester knitting yarn

I am not sure I would have the patience to use the last thread very often!


Wednesday, November 28, 2007

Still Lesson 3

This is just playing with the elements of design using stitches I have learnt in this Lesson 3. However as a design I have to admit it is a disaster! Nonetheless I am documenting it with my other samplers because it has certainly been a learning experience.

There were a variety of threads used for this stitching -ranging from a 2/20 mercerised handdyed weaving leftover to perle3 in cottons, a handdyed fine woollen yarn, and some medium sized linen thread.

I don't enjoy couching very much - I have trouble in persuading the thicker 'thread' to lie just where I would like. These exercises indicate what is needed to be practised when the class finishes. Many of the stitches still require an instruction sheet beside me while I work.

I look forward to Sharon's challenge for 2008 - sharonb.wordpress.com/take-it-further-challenge/ - to be inspire me to continue the voyage I started this year.

Monday, November 26, 2007

Chains all round!

I have been wanting to stitch a paisley teardrop for some time. I also needed to sample chain stitch curves. Crested chain looked like a stitch suitable for outlining. The fabric was the second piece of synthetic felt. This was a mistake as I discovered that the felt does not take kindly to unpicking! It doesn't do anything obvious, just gets thinner and thinner! However I persevered and this is the result. As well as crested chain, the stitches used are chain, twisted chain and cable chain.
The threads varied from DMC perle 3 to Finca perle 12, as well as a couple of weaving yarns, pink threads in 2/10 cotton and a linen of the same grist.

Saturday, November 24, 2007

Chain, chain amd more chain!

Lesson 3 is concentrating on line and how it can be stitched. This sampler is my attempt at a number of different chain stitches.

Starting from the right : Chain stitch; Heavy chain stitch; Feathered chain stitch; Cable chain stitch; Open chain stitch; Zigzag chain stitch; Twisted chain stitch; Threaded chain stitch; Zigzag cable chain stitch; Knotted cable chain stitch; Rosette chain stitch; and Whipped chain stitch.

And that is not even the complete set of chain stitch!!! The thread used was perle cotton in weights from 3 to 8. It could be instructive to repeat this exercise in woollen yarn.

I am unhappy with my tension but am sure that that can be rectified with practice.

Thursday, November 22, 2007

Waltzing Matilda


Quite some time ago I wove some double weave using a name draft with the words "Waltzing Matilda" as its basis (the top scan).
The fabric is quite a narrow strip as it was woven for a sample exchange. However since it was quite a long warp I decided I could make a vest using this fabric for the vest fronts and wove another double weave in checks in the same beige and white yarns (2/20 mercerised cotton) for the back.
However there was still a fair amount of fabric left. I had kept it with the intention of 'doing something' with it eventually. Well that day eventually arrived - for a short section, at least.
In our Personal Library of Stitches lesson 2 a design exercise was to use fabric from our stash with geometric designs in which points dominate and examine what happens if one embroiders on it with stitches from this lesson. Handwoven is often a good example of such a fabric and I chose this one.
I did want to try the embroidered circles with longtailed lazy daisy but on completion I have decided that maybe I got carried away. It may have looked better in a lighter tone thread! Never mind! There is ample left to repeat the experiment after the class has finished. Now it is onto Lesson 3 with its emphasis on "line"!

Friday, November 16, 2007

On the Grid!

The fabric is Aida (stiffer than a board, especially after felt!) . The threads are all Perle cotton except for two rows of stranded cotton floss - the palest pink is 2 strand and the row below is 6. The perle varies from DMC 3 to Finca 12.

The red stitching is my Chevron practice - nothing very exciting - I need to think of something more adventurous.

The remainder of sampler 4, Lesson 1, is cretan , a stitch that I can see has tremendous possibilities.

Now I really need to concentrate on Lesson 2

Thursday, November 15, 2007

Cretan Stitch


This is certainly not well stitched but it is worth keeping until I can find time to repeat the exercise or try something else to improve my Cretan stitch.

It was also very difficult to scan.

Lesson 2 arrived today and it looks so interesting.

Wednesday, November 14, 2007

Nothing to show for today

I have no photos or scans - however I have learnt something. I had kept a pile of used Colour Catcher sheets because they had interesting colour patterns. The thought was maybe I could use them for embroidery. Definitely not a proposition for hand embroidery. A real pity as the mottled dye effect was just perfect. I tried some Portuguese Stem Stitch. The needle tore the fabric unless the stitch was enormous and probably would still have done so if I had pulled the stitch. I had joined two sheets with a machine zigzag seam and that was not a problem so maybe I won't throw them out yet as machine embroidery may work. Not sure but worth a try.

Today it occurred to me that there was a nice piece of grey woollen felted fabric that could be useful for a sampler. Unfortunately it is too thick for the hoop I am using. I need to try some cretan without a hoop and see how it goes.

I have also remembered my stash of hand-dyed fabric that I acquired by virtue of an international dye swap 8 or 9 years ago. While some was used to make fabric boxes twelve months ago there are quite a number of interesting pieces still in the cupboard, just begging to be used.

Tuesday, November 13, 2007

Sampler? 2

Not really sure if one could call this a sampler.

Felt and buttonhole stitch seem to be made for one another. I wanted to try some variations on buttonhole stitch and did exactly that -but not quite as I originally intended. Every stitch on this piece is buttonhole except for a few straight stitches and a lonely French knot! I just got carried away and enjoyed myself.

Monday, November 12, 2007

Thread for Sampler 2


I have decided to use cotton floss, mostly DMC, for my second sampler which, at this stage, is looking at buttonhole stitch - of course, this is liable to change at any time.
I used mainly perle cotton, my preferred thread, for the first sampler. However, my range of perle colours is very limited while I do have quite a nice range of cotton floss colours, leftover from those cross stitch days. So I could find some really nice colour combinations. This is not a bad reproduction of the floss colours except for the greyed greens which look more grey than they actually are. I don't know how to improve this, unfortunately. Colour play is always fun - now I only need to stitch!

The Blackwork Sampler


Having got as far as adding my first sampler for PLOS I decided not to wait until I finished this piece - so here is the piece "under construction", so to speak!
I wanted to do some blackwork - mainly because I liked the way you could use the stitches to produce tonal variations independent of colour choices. I borrowed Pat Langford's book "Embroidery Ideas from Blackwork" from the library and knew I just had to own it. I acquired a second hand copy in good condition. Pat was such a wonderful needlewoman with tremendous design skills.
Blackwork appeals also because all the stitches are quite uncomplicated - the biggest problem I have is being able to see the threads in the fabric!
As a weaver I belong to the "fullsize" sample brigade - I never could see the point of threading more than was necessary and as the time went on and my familiarity with yarns increased I made fewer bad choices. I still have this mentality and decided that the only way I would try enough stitch variations would be to make a series of "fullsize" stitch samples. (Maybe PLOS will change my attitude to samples - I hope so).
Gumleaves seemed like nice shapes with which to begin. In my daily walk I spend a lot of time keeping my eyes open for suitable leaves - our parks are full of gum trees. This was a mixed bundle I collected, dried and traced around for the outlines. Next time I have a collection of Cadagi leaves and I think I could 'branch' out into other species for the future.

Sunday, November 11, 2007

Something to show at last!


I do realise that it has been a long time between posts. However that is because I have not had anything to add. I have been playing with blackwork samples and intend to scan the first one as soon as I finish it. I had hoped to be able to do so before last Thursday when Sharon Boggon's new class began but didn't manage to do so.

The new class I am doing is Develop your own personal library of stitches (PLOS).


I am enjoying myself and have completed the first sampler . This started out to be an investigation of Guilloche stitch and some variations within the stitch - however as usual I moved in another direction altogether and the study of variations has been postponed to another day.


The Guilloche stitch was used for a border and as this was so braidlike I decided to use the sampler to see what other braids I could stitch. I am quite pleased with the result but do realise there is room for improvement in the execution of the stitches.


What did I learn?

I like the effect of the DMC Antique Effects in the Pekinese stitch but would avoid that thread in the future - it is difficult to thread - it is impossible to control when I stitch. My skills are just not up to that. Threaded Pekinese is very effective and would have been a much better border than the Guilloche - it could handle a smooth curve nicely . This was on this week's TAST.

I liked, no loved, the Guilloche but need to spread the stitches a little - the stem stitch is lost. I definitely will try the variations but probably not this week.

I need to spend more time with the herringbone and feather to see what other kinds of braids I can come up with.


Saturday, September 15, 2007

Finished the Opera House


My last piece associated with the Sumptuous Surfaces course is complete.
I have struggled with this one - I think abstract designs are easier to do. I spent half the time stitching and unpicking and restitching. However I think I am happy with the finished piece.
I tried 2 new pulled thread stitches but otherwise anything new got removed. My fingers don't seem to do exactly what my brain tells them. Maybe I just need lots more practice.
I do like Pulled Thread work and intend to try out more of these stitches - maybe a set of samplers like the illustrated ones in Mary Thomas. My next project is to do some blackwork - I am fascinated in how it can be used to give incredible shading. Some of the work I have found in books is so beautiful.

Monday, September 10, 2007

The correct orientation!


Amazing what a good night's sleep can do for your brain!
I worked out how to get the image I wanted. Quite simple really!
This looks more like it should. I have not done any more to it since yesterday - I am making very slow progress with this piece.

Sunday, September 9, 2007

A fortnight's work!!!


There is not very much to show for nearly a fortnight's stitching. However there has been much more work done - I needed to do a certain amount of unpicking before I was satisfied.
I really enjoy doing pulled thread work . My black and white version of Mary Thomas's stitch dictionary has some beautiful sampler illustrations of pulled thread work. I wish I owned her embroidery book as well as her dictionary!
I am not sure where I go from here - some pulled satin at the bottom for a start. This piece is definitely changing as I go along.
I will have to try to get a scan that is not a mirror image also!

Tuesday, August 28, 2007

Four coloured double weave


The first image is of the vest fabric where I used 2 grey wefts - the second uses a pink and blue for the wefts and a different treadling sequence. With the enormous hiatus between weaving the two sections I am not sure how much warp is left . There may be sufficient to try another combination of colour and treadling - I hope so. I guess one could call these "full sized samples" - the only size I seem to produce these days for my weaving. Since I use 2/20 mercerised cotton for most of my weaving I am comfortable with how the yarn will weave up and the only surprise is how the pattern turns out on the loom as opposed to the computer view. My designing is done on PCW and/or Weaveit Pro.
Meanwhile I keep practising my embroidery stitches!

Monday, August 27, 2007

Weaving again!!!!


No I have not given up blogging - just been busy.
Yes, I am back on the loom. I thought that I might have forgotten how but it doesn't quite work like that. I do manage to drop the shuttle occasionally but that is just clumsiness.


I have retied the 4CDW black and white warp that was originally intended for Pete's vest - his birthday present. I used two greys in the weft and got my "skink" fabric. Photos will follow in the near future - of both fabrics, not the vest unfortunately, as I forgot to take one of it before I gave it away. For the second section of the warp I have changed the treadling and weft colours - it is so interesting. I am still addicted to 4CDW - the colour interactions mean one never gets bored.

However since I find that I can't weave for very long each day I have been back sampling stitches. I want to try as many pulled work stitches as I can before I start the Opera House.
The picture above is my latest sample piece - I used it to help make decisions for the Butterfly Effect as well as my pulled stitches. I don't cover much ground in any one day but I am learning (and increasing that vocabulary). I had quite a bit of trouble with Pulled Honeycomb but think it was conquered eventually.
Sometimes I wonder if a sample piece is not similar to a dye cloth used to wipe up the spills - almost a composition in its own right!
I have also been rereading some of the needlework books off my bookshelf . I am finding I am approaching these differently after having done the Sumptuous Surfaces course. The Needlework School has an interesting contemporary blackwork piece illustrated. This has piqued my interest.

So there is plenty to learn.

Tuesday, August 21, 2007

A slightly improved image

Making scans of embroidery pieces is not easy! I increased the resolution slightly and took it out of the hoop to see if I could improve the situation.

Now that I have two postcard-sized embroideries it will be interesting to see how they can be framed. This won't be easy as both are quite heavily textured - the first one even so more than this.

Monday, August 20, 2007

Second piece complete


At last I think I am finished! Here is the "Butterfly Effect".
I am not totally happy with the scan but it certainly gives the general idea.
I found this piece quite confrontational, especially while I added the textural bits which represented the emerging tumours.
This course has been very exciting. Six weeks well spent. The course was very well designed. Sharon Boggon did a great job. The lessons I will print out and get bound for future reference. I learnt a tremendous amount about design, in general, and about embroidery, in particular. Now hopefully I can apply some of the design techniques to further embroidery but also to my weaving.

Tuesday, August 14, 2007

More work on Sumptuous Surfaces Piece 2

Today saw it all change. Sharon's muted colours suggestion helped. I had already used the palish green for the outer areas of background but then added to the pulled satin area. I feel that this has done what I wanted. I am grateful to everyone for their helpful suggestions. The support in this class is great.

I may add a couple more red lines but I think I will wait and see how the whole thing develops first.

Now I need to work out how to do the butterfly. It is to sit in the top left hand corner. I envisage it as fairly delicate. Perhaps the wildlife of Brisbane area book can help.

Monday, August 13, 2007

One day at a time!

My progress is quite slow. This was yesterday's effort and I did spend a good portion of the day stitching. While I eventually made a decision on this background I am nonetheless struggling with how to make it a less sombre piece. The actual work is not quite as dark as the scan.

I did try some knots and because they were deep purple, deep blue violet and red they added to the overall darkness of the piece. (Unpicking a pile of knots is definitely not much fun!) Maybe this is where the beads at the end lift everything!

Also I am not sure what I can use for some background in the outer areas. As well, the butterfly in the top right hand corner has me completely stumped at the moment. Definitely more questions than answers!

Sunday, August 12, 2007

Outline for second piece


Well, I have at long last begun to stitch the real thing! After much deliberation and practice stitching I have stitched this much of the outline. I used multiple rows of stem stitch for my outlining again.
How much more outline I need is as yet unknown. I think I will try some background (if I can make up my mind which stitch I want to use) before I add the rest.

Friday, August 10, 2007

Lesson 5


Lesson 5 has arrived! I am overwhelmed by colour - it had not occurred to me that I would find working in monochrome so much easier than in colour. One less dimension to worry about- no doubt.

I am currently trying out stitches for the background low relief areas. This has been a fun exercise as all the stitches are new to me. If I am to have any hope of finishing this before the end of the course I will have to make up my mind soon.

What a lot of information there has been in the 5 lessons! And how sad I am going to be next Thursday when the last lesson arrives.

While I am stitching my rice and punch stitches occasionally I let my brain wander on the Opera House exercise and have come up with a new sketch(?). I think this one might be fun to do after the course is over. Then again maybe I need to take a course in sketching!

Monday, August 6, 2007

Colour Games

I have spent the last 24 hours playing colour games. I have two great books on colour that I consult whenever I have such an exercise - "Colour Harmony Workbook" and Deb Menz's "Color Works". I particularly enjoy the latter because it is written for fibre workers.

I am not sure about the greens - I think I will use the yellow as the contrast.

Back to the needle and more practice on the hoop.


Sunday, August 5, 2007

The Butterfly Effect


A new direction - I am not dropping my Opera House idea, just putting it on the back burner for the time being. This is an idea that has been incubating in my mind for some time. I have been wondering about the random nature of the onset of cancer - why a person who is seemingly extremely healthy can suddenly fall victim? What makes one person more susceptible than another?
The analogy of the "butterfly effect" seemed particularly apt to me. Here is my preliminary sketch of a design. Now I need to think more about the stitches and colours I will need to use!

Saturday, August 4, 2007

Version 2


Version 2 - I would definitely have had difficulty in stitching the detail in the previous version. I zoomed in and cropped a section and have finished up with this one which, I hope, is achievable.

Friday, August 3, 2007

Lesson 4


It is all steam ahead for Lesson 4.

I wanted to have a memorable souvenir of Sydney. This drawing is based on a photo we took in 2002 and chosen because it is view of the Opera House I particularly like.

Now I have to start to think about a colour palette.

In between times I am practising some of the stitches from Sharon's dictionary - cast on stitch and bullion knots so far.

Wednesday, August 1, 2007

I decided to try a scan to see if the colour is better. I do think both the colour is better and maybe the seed beads show up slightly better. I will leave both pictures.

Peace in your heart

Well...what a week! No time for blogging - I got carried away stitching French Knots instead. Hopefully the execution of this stitch improved as the piece progressed. I think my monochromatic piece is finished. Unfortunately the colours in the photograph are much darker than the original; possibly because the texture is so thick that the flash couldn't penetrate.

What have I learnt?

1.Maybe I can start with a concept and develop a finished piece - thankyou Sharon. It has been a wonderful three lessons and I can't wait to start again and include colour into the mix this week.

2.That I love hand stitching . Amazingly as I get older and time seems to disappear much too quickly, the more I realise that time is something to be savoured, not gobbled in gulps.

3. Not really something new - I love playing with creams and whites. (However I love colour interactions also - so maybe I just like playing!)

Thursday, July 26, 2007

Goodness, Lesson 3 arrived this morning and I have had to work very hard to get this much done to move on to the next part.
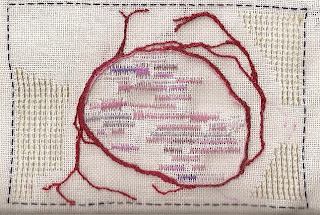
I changed my mind a little from the stitch plan of last week - I used Portuguese stem Stitch for the large circle but then chose two rows of Stem stitch for the smaller circles. I also reduced the number of larger arcs - they seemed too close to the circle group.

I am enjoying the process enormously and have spent a considerable time working on it. Now comes more fun! The heavier elements.

Monday, July 23, 2007


As well as working on Sumptuous Surfaces I tied the fringe on the last of a series of woollen twill scarves that I wove last year. This was the last one to find a home and was a gift for a good friend. The colour scheme goes very nicely with the exercise above!


Since the arrival of Lesson 2

I have spent some time in the last few days trying out stitches- it may not be very obvious but I feel I did improve as time went on. Portuguese stem stitch certainly looked better when I followed the instructions properly (in the small circle) and hopefully this will show in the actual piece. I did hesitate about adding this scan but feel it is important for me to document this exercise as accurately as possible.


I have come up with a tentative stitch plan for the outlines and background. I really like the effect of using Moonshine with the linen for the background - unfortunately it did not show up in the sample scan.


I omitted a border which it probably needs. It could be brown whipped stem stitch. My colour scheme so far is very pale - however I am hopeful that the addition of darker beads in the next part will add sufficient contrast .


Friday, July 20, 2007

Well Lesson 2 arrived yesterday. Now to turn that Concept into a Form!

I spent quite some time playing with Portuguese Stem Stitch. I discovered a number of things - probably the most important one was that most of my stitching (and certainly any with an ecru thread that matches the fabric) will need to be done in good natural light - the penalty of aging eyes! I like it (PSS) and will probably use it to outline my large circle. I have been trying other stitches recommended by Sharon - lots of fun. This morning I calculated it is at least 51 years since I spent any time on any embroidery except cross stitch. No wonder I feel very rusty. Hopefully my fingers will become more agile as time goes on.

At the moment it is only sampling - I made a part tracing of the design on a small piece of linen. I tried the PSS, outline stitch and stem stitch for outlining the circles -after that some pulled cretan stitch for the background - first in a fine white singles weaving linen and then in an even finer weaving acrylic yarn, Moonshine. Moonshine is possibly too subtle to be used on its own. It is not much thicker than some human hair but I do like the irridescent effect it can give. I like the effect of pulled cretan. I think I would like to stitch the larger arcs in either running or back stitch . There is lots more experimentation to be done.

I am not sure how long I have to play before I get stuck into the actual piece. However I must try a few more stitches before I can submit my ideas for feedback. I also think I might need some slightly darker threads - the ones I have collected are mainly very pale tones.

Wednesday, July 18, 2007


Well Sumptuous Surfaces has sent me off in new directions. Not only am I having to learn to design an embroidery it seemed a good time to begin a blog.


The course is wonderful - week 1 has been a steep learning curve for me and no doubt the curve will remain in that direction.


My Concept has narrowed down to "Our Family Tree". I started with the thought of circles emanating from peace in one's heart. After research on the Web and considering various symbolisms of circles and rings I was taken by the imagery of "Flower of Life". My design has been based on this.


The centre of the "Flower of Life" has 6 circles of equal diameter - I used this in my large circle to represent our family. The smaller circles represent our children's families including their spouses and our 7 grandchildren. The concentric circles enclose the entire group.